10 Consejos para ahorrar en tus impresos • 10 money-saving tips on printing

Hay ciertas aspectos que debes considerar para sacar el mejor provecho de tu presupuesto de impresión.

There are certain issues you should take care of so you make the most of your print budget. Your graphic designer and printer can always help with this.

1. Escoge el mejor método de impresión para tu proyecto

Hoy en día, el offset ya no es la única opción. La impresión digital ha avanzado en calidad y ciertamente ha demostrado sus ventajas en los tiempos de entrega. Generalmente, los tirajes cortos (1 a 1000) son buenos candidatos para impresión digital. Los tiros cortos o de una sola ocasión, como menús o algunos materiales de apoyo para ventas son buenas opciones para prensas digitales. Otra ventaja de la impresión digital es la posibilidad de datos variables. Por otra parte, en los tirajes largos o formatos mayores, así como usando colores directos, el offset es todavía la mejor opción.

1. Choose the best printing method for your project

Nowadays, offset printing is no longer the only option available. Digital printing has advanced in quality and certainly it has demonstrated its advantages with time response. Generally, short print runs (1 to 1000) are good candidates for digital printing. Shorter and one time runs, such as menus or sales aid materials, are also good options for digital press. Other advantage of digital printing is when variable printing data is required. On the other hand, large printing runs, larger formats and direct color prints are still best produced with offset.

2. El tamaño de papel es importante para reducir costos

Tu diseñador gráfico y el impresor pueden sugerirte el mejor tamaño para tu proyecto, tomando en cuenta los tamaños disponibles en los pliegos usados por las imprentas. El tamaño final de tu pieza, debe tomar ventaja del tamaño de los pliegos para que no haya desperdicios innecesarios que resulten en mayores costos para tí. Los tamaños inusuales casi siempre incrementan los costos.

2. The size of the paper is important to reduce costs

Your graphic designer should be able to suggest the best size for your project, taking into consideration the size of extended paper used by commercial printers. Your final piece should take advantage of the size of those extended paper so there is no unnecessary waste resulting in a higher cost for you. Odd sizes will almost always increase the cost.
Continue reading

When graphic design implied actual cutting and pasting

I have been a graphic designer for more than 20 years. During all that time, technology has made our job a lot easier. Maybe new graphic designer generations take for granted all the tools we have nowadays to perform our craft, but back in the day -not than long ago anyway- producing a print ready original, was much more complicated than a few clicks on a computer keyboard.

I chose this theme for my first post because all of this makes me love my job even more every day. There is always something to learn, every project is different, every client presents a different challenge.

But back into the theme… I would like to point out to all of you that hadn’t have to go through the cut and paste process, all that it took to produce a print ready art work. After you had designed, sketched and presented a hand-made dummy to your client for approval, the pain started. Setting type implied you had counted all the characters in your text; for this you needed tables that indicated how many characters there were on a typed text for a certain kind of typewriter. Picas, points, Ms was the every day language. Once you had that total amount, you would need to convert that number into lines of text of the required font; Helvetica for example.

You needed another set of tables with the typographic factor for that exact font and size, knowing in the end, how many lines of text would you get for a certain line width of Helvetica regular 10/12. There was a very little margin for error here. And mistakes or changes were expensive and certainly time consuming.

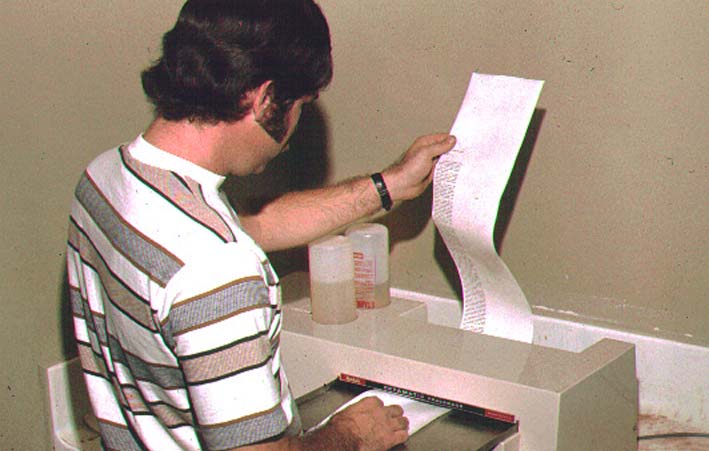
All the text went to the typesetting company where someone would type it and gave you back, stripes of photographic paper – it smelled awful by the way – with your text in a single and long column. This would normally take one day.

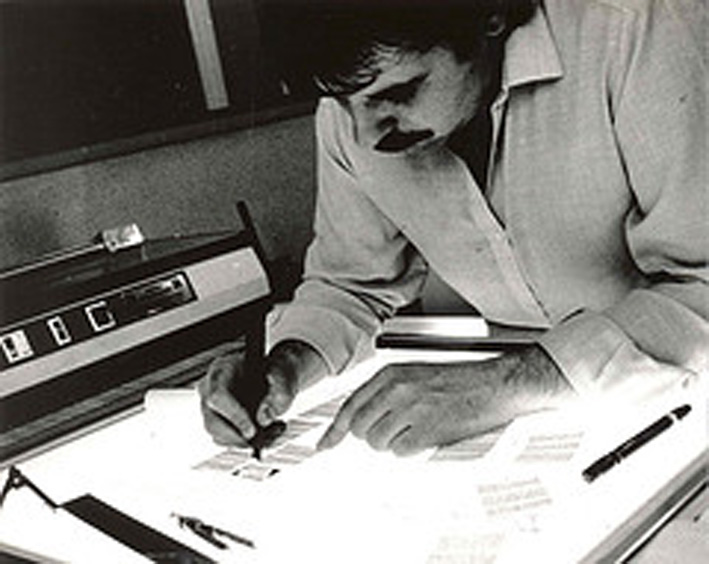
Once you had this material ready, cutting and pasting was in order. All the pieces should be mounted on a white cardboard: Photos, illustration, all of this previously airbrushed and hand-made. Then the text would be cut out from the column and pasted to the cardboard.

This was not a simple process. You had to trace guidelines with a blue pencil – so they wound not be seen by the mechanic cameras- and cut the block of text with xacto knives.

The pasting was a craft by itself and often a mess. You could use wax with instruments developed specially for the task, or glue spray. Once you managed to paste everything into place, imagine what would happen if you suddenly discovered you had missed a comma, or a word was misspelled, or worst:  that your client had changed his mind and had changed half the text. All of the process would have to be repeated all over again. Once pasting and cutting was finished, the client usually had to sign for final approval, and you all know what that means: One more chance to make “just one more little change”.

But we knew no other way. That was just the way it was. So when you presented a comp or a dummy to your client, you had to be sure that everything was as perfect as it could be. Design was more of a planning process than today, when you can think along as you produce.

For those wandering how old am I, let me tell you that computer desktop publishing was available back then, it was just not the standard. Only very few New York advertising agencies had it. Everything developed very fast though. All these systems were available for all rather soon.

The next time you drag a blue guide to your Photoshop or Illustrator artboard, remember all the amazing technology that lets you to do so, instead of tracing it with a blue pencil, enabling you to work more creatively and freely in this great profession of ours!

Photograph 1 origin  Photograph 2 & 3 origin